Edit a food photo in android ? PicsArt and lightroom can fix it.
Edit a food photo in android ? PicsArt and lightroom can fix it.
Melapplon is a creative food photographer. She recites the story behind our daily life inanimate objects and she loves to personify the objects. you can check my posts on Instagram. Melapplon's instagram
Do you want to edit your food photo in android? Do you want to make it look tastier ? Is it necessary to own a camera and a software to edit it? NO ! you have your phone or a camera and universal light :- sun . That's all ! capture your creative photo and edit by the following procedure.
1. CROP
Depending on your need crop your image and rotate if require.
2. ADJUSTMENT
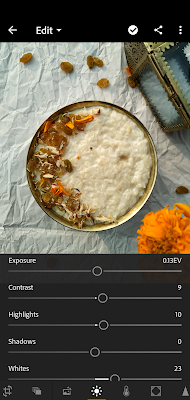
Since my background is white I will increase a bit of exposure, contrast ,highlight and a lot of white .
3. CURVE
I found this part the most complicative part. Your one mistake can ruin your whole photo.(till now I have a very little knowledge about curve so don't be upset see the attached photo above and try to understand by yourself)
4. WHITE BALANCE
This is not a eye dropper but an amazing tool. I made changes in temprature(it gives a sunny effect), tint, and vibrance. no saturation this time because there is no need. I usually increase saturation in most of my photos.
5.COLOUR MIX
Colour mix is an amazing equipment when you have contrasting colours in your Image. this selective tool is available is free version also.
a) Red
Hue - Decrease
Saturation - Increase
Luminance - Decrease
b) Orange
Hue - Decrease
Saturation - Decrease
Luminance - Increase
c) Yellow
Hue - Decrease
Saturation - Decrease
Luminance - Increase
,
d) Green
Hue - Decrease
Saturation - Increase
Luminance - Increase
6.EFFECT
This process gives depth and enhances the texture of your food photo .The kheer will look pretty good by adding clarity and texture,
7. OPTICS
Turn on your both the options . They secretly contributes to the photo. I am not doing any manual setting.
Now all the lightroom edits ends here. Next part is adding magics and watermark. This is going to be amazing and interesting too. I truly enjoy this process. one might found the above process like a rocket science but trust me you will master with a little bit of practice and next process is really a piece pf cake. let's begin.
8. PICSART
This is the step where my photos are treated with magics . Share your partial eddited photo to picsArt and click on the stickers . Add your favourite stickers. Mine are Brokeh effect , sparkles and neon stickers.
9. LENS FLARE
It's almost ready but I believe that a beam of sunlight will doubles it's beauty. keep in mind to decrease the opacity or else it will look artificial.
10. WATERMARK (last process)
Protect your creation with your watermark.
Editting and photographing both contributes equally for a good, dreamy and tasty photo. Hope you have enjoyed the article. your feedbacks are most welcome. Create your image and share it with us on Instagram by using #melapplon and get a chance to be featured in my Instagram story.
Thank you!


Comments
Post a Comment